
In this tutorial I’ll be teaching you how to draw this digital painting of an angry orange from start to finish. This video is actually the third or the last part of the tutorial series. So if you haven’t see the first part and the second part, please do so first before you start watching this one. I’ll be using Krita version 4.2 for this tutorial and some of the techniques I’ll be using are only available since Krita version 4.2. So just make sure you have this version or later versions installed in your computer if you want to follow along. Okay.
Here are the links to all of the 3 parts of this tutorial series.
- Part 1 where we cover:
- Base coloring
- Shading the body
- Creating the eyes
- Creating the eyebrows
- Part 2 where we cover:
- Creating the mouth
- Merging layers
- Shading the eyes area
- Mouth casted shadows
- Eyes casted shadow
- Part 3 which is this article you see now where we cover:
- Twig color
- Leaf shading
- Leaf casted shadow
- Adding textures
- Adding backlights
Twig color
At this stage. We want to create color gradation on the twig. We want the color of the upper area to be shifted towards a common tree branch color which is brown. To do this first make sure we are in the twig layer. And turn on the “alpha lock” option. Next, pick the airbrush brush preset again. Make sure the eraser mode is off now. Just choose this brown color from the history. And brush the upper part to make the color more brownish.

Let’s add a direct shadow on the twig. Again, the process is similar as before. We need to create a selection first. But this time I want to show you a different approach on casted shadow. Rather than using a dedicated layer with “multiply” blending mode, this time I will change the “blending mode” of the brush to “multiply”.
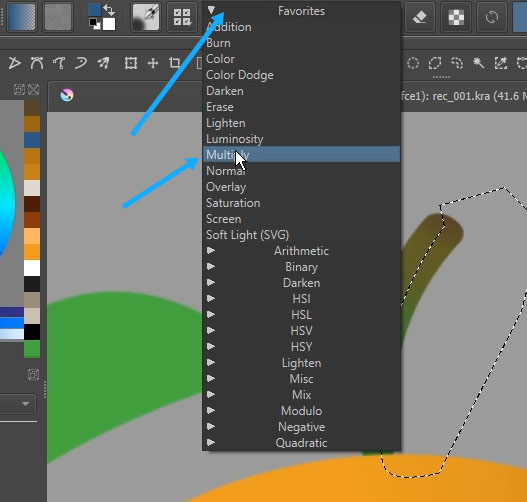
And then just brush out the selection. The result will be similar with the previous technique but this one is more straightforward. But the downside of it, it is a destructive approach because we’re applying the color directly on the main layer. I’m just trying to show you here that we can achieve the same result, visual wise, with different methods. Okay.

Leaf shading
Now let’s move on to shading the leaf. Pick the leaf layer and turn on the “alpha lock“ option. But before adding any shading color, notice how this leafstalk color is very different with the twig color. Let’s make it more seamless.

Choose our airbrush preset again but this time change the blending mode back to normal. Pick the color from the twig by holding Ctrl and then click on it. And just draw some brush strokes on the leafstalk. Okay.

Next let’s focus on the dark part of the leaf. Choose the “bezier curve selection” tool again. And create a selection like this. Okay.

Now press B to use the brush tool. Hold Ctrl and pick the green color of the dark leaf, but then press K to make it even darker. And then just brush out like this. Make sure the bottom part is darker than the upper part.
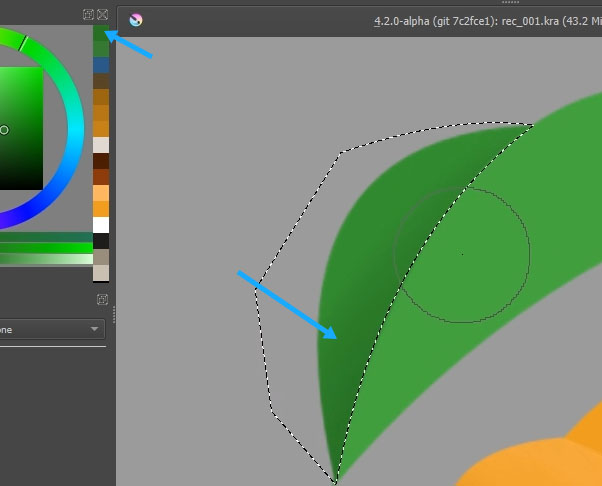
For the brighter part of the leaf, create a selection again. Pick the existing color and then make it darker. Then just add some brush strokes again like this. Make the lower part darker than the upper part. Okay.
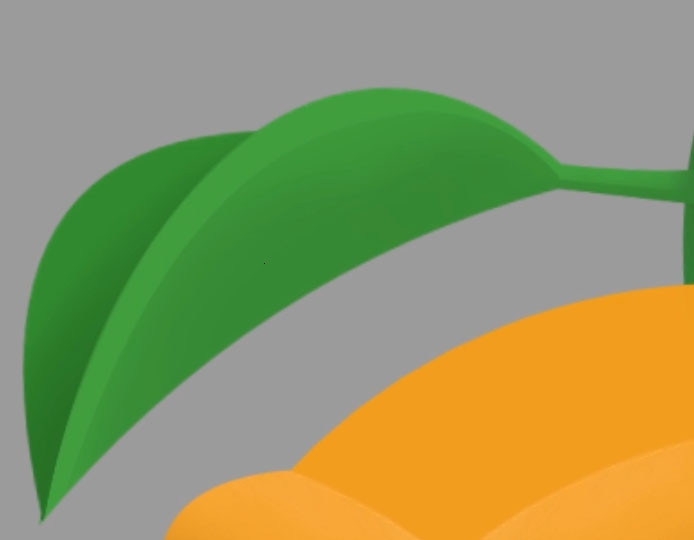
Next use the blur brush to smooth out these edges. I think I want to add a more darker colors on the leafstalk. The process is the same with how we usually add shading colors, so I believe you already understand the drill now.

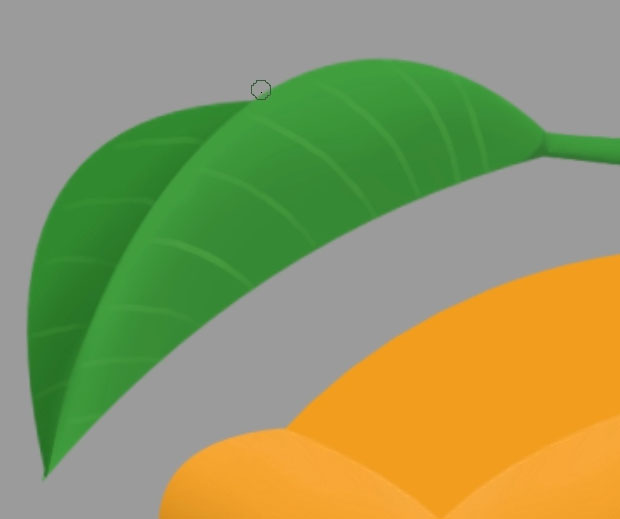
The last thing we need to do for the leaf is to add lines or the leaf veins. For this we can use a new dedicated layer. You can use the leaf layer directly also if you feel confidence. For detailing I will use this marker brush.

And pick a bright green color for this. And then just carefully create the leaf veins. For this process, you can use the brush stabilizer or “brush smoothing” feature as Krita calls it. But I won’t be using it now because these are just almost straight lines, so really it’s not that hard to do. Okay, now we have a nice looking leaf.
Leaf casted shadow
The next step of our illustration is to create casted shadow from the twig and the leaf to the main body. Let’s create a new layer. Now you might be wondering why not use the existing casted shadow layer? Well because, for this casted shadow I’m going to show you another method. Essentially we want to create the silhouette first using pixels rather than just a selection. This way we have more flexibility to make any changes on the silhouette. After we like how it looks, we can then turn it into a selection. For the pixel silhouette you can use any color that you like, it doesn’t really matter as it just a temporary place holder to create a selection. Later we can delete this layer.

Now, this is where this method can be really handy. For example we want to make the shadow to follow the contour of the eyebrows. First, we can reduce the opacity of the silhouette layer so we can see what is going on beneath it.
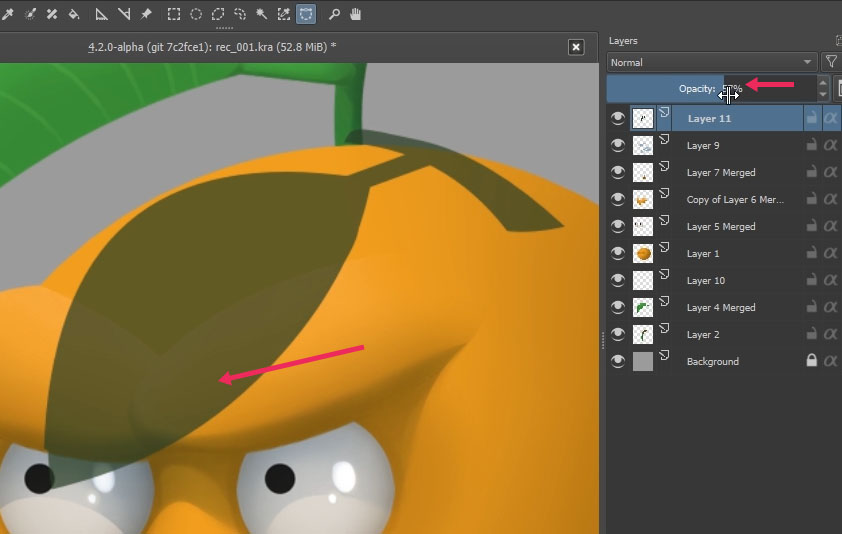
Make this part a bit bulged to the left.

And for the right part we can create a selection like this. And then delete.
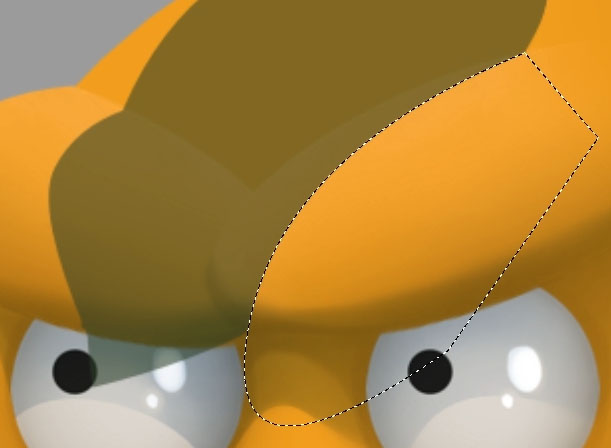
Next we also need to remove the upper excessive part.
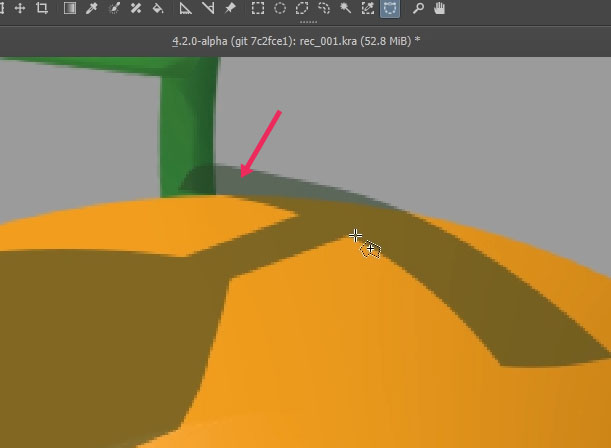
For this we can use the same bezier tool technique, but I’m going to show you a different method now. Because the shadow should stay inside the head region, we can use selection generated by the head layer to help us. Just hold Ctrl and click on the head layer’s thumbnail. Please be aware that this feature only available if you are using Krita version 4.2 or later. Okay.
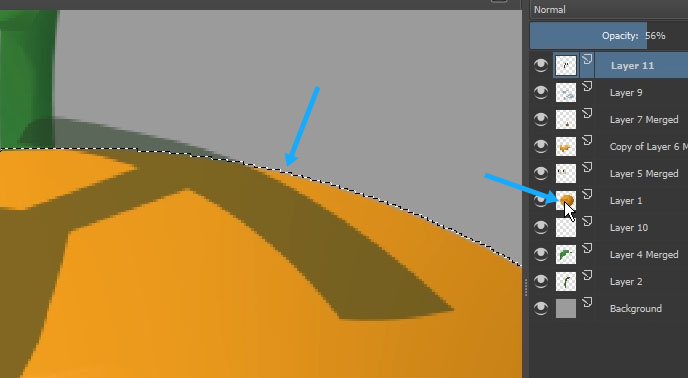
Next we need to reverse the selection by holding Ctrl+Shift and then press “i”. Then press Delete. Okay I think already we have a nice silhouette for the casted shadow.
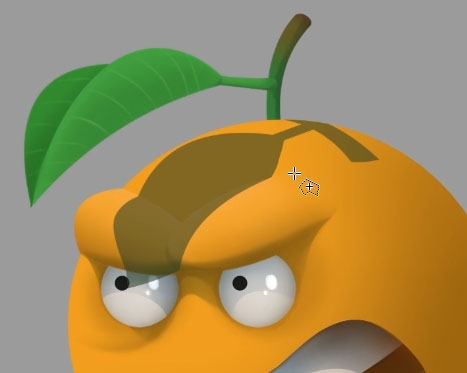
To generate the selection from the silhouette layer. Hold Ctrl and click on the layer’s thumbnail. Hide the silhouette layer and then go back to our casted shadow layer. Press B and pick our airbrush preset again. Make sure the blending mode of the brush is set to normal and it is not in eraser mode. Choose the blue color we used before. And then just add several brush strokes like this. We want the upper part to be a bit darker then the lower part. Okay.
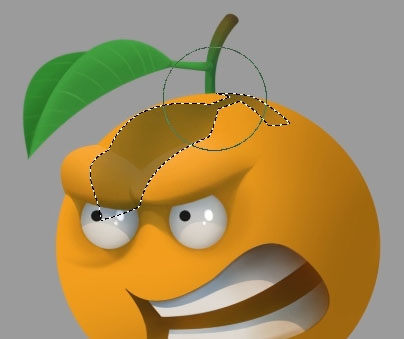
Next we need to blur out the shadow borders where they are further away from the shadow sources which is in our case the twig and the leaf.
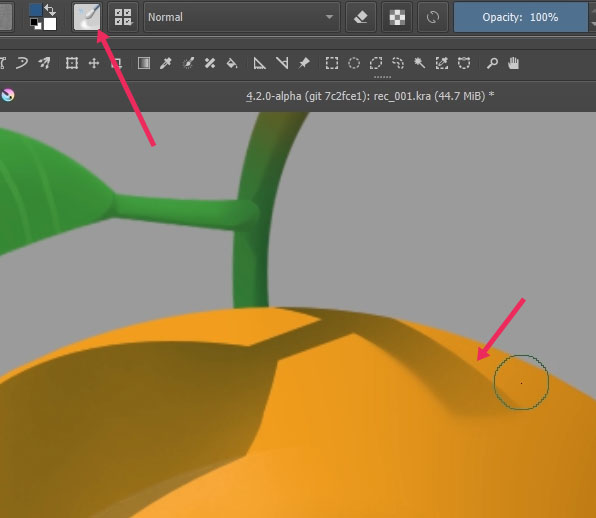
Next, I think I want to add more bluish shade color also on the leaf and on the twig. Just my personal preference. We can use the existing casted shadow layer for this. But we need to extract the selection first from the leaf and the twig layers. To do that hold Ctrl and click on the leaf layer thumbnail. Then to add another layer selection, we need to hold Ctrl and Shift together and click on the twig layer thumbnail.
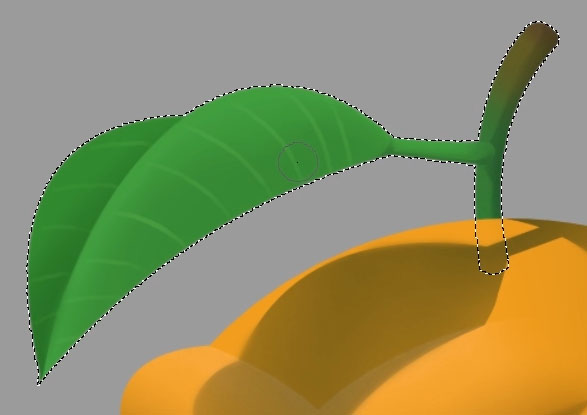
Now we need to exclude the left part of the leaf. To do this we can use the bezier selection tool. But before we create any selection, press S first to activate the subtract mode. Then create a selection to reduce the existing selection so we have something like this.

Next use the airbrush preset to add the shading color. And then use the blur brush to smooth out the shadows as needed.

Finally for the shadow colors in general, I think we need to make the lower right head area a bit darker. To do this, first we can hold Ctrl and click on the head layer’s thumbnail. And just use the airbrush again to make these bottom right areas a bit darker.
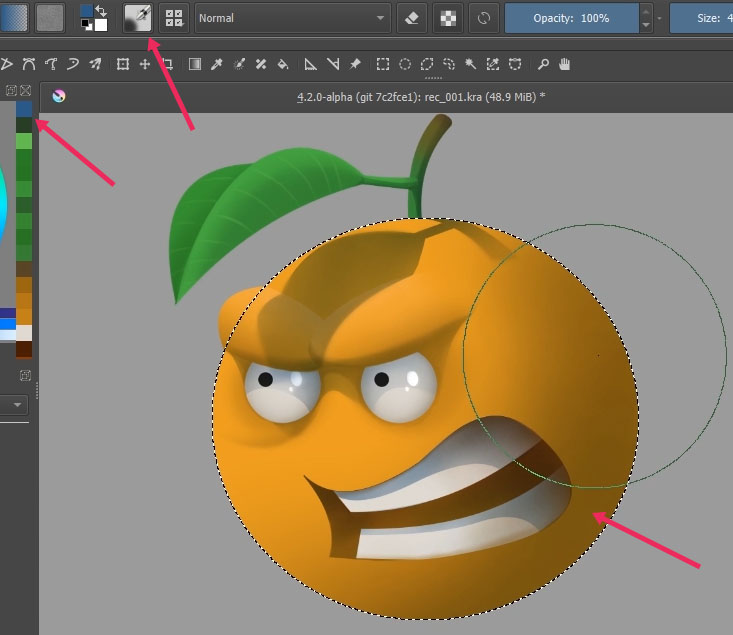
Again this is just my personal taste. Now, of course there are still tons of things that we can do to refine the illustration in term of the shadow colors. But mostly we’ll just need to use the same techniques as we already covered before. So let’s just move on to adding the textures.
Adding textures
First let’s add texture on highlight areas. Let me delete the silhouette layer as we don’t need it anymore. Create a new layer and set the blending mode to “screen”, “screen” will make the colors below that layer to look brighter, so it is perfect for adding highlight colors.
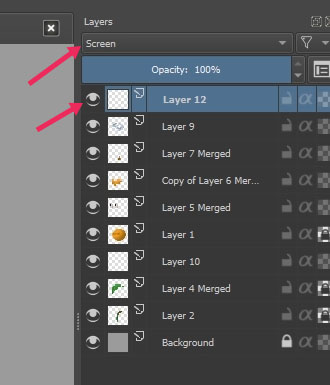
For the brush, I’ll use this chalk brush preset because it already has texture that looks like an orange skin.

Pick the color from the head, but then make it a bit brighter. And then just add some brush strokes on the area where there should be strong highlights. It is okay if the pixels bleeds out of the head area. We’ll fix this later easily.

Okay. Now we want to reduce the highlights so they fade out naturally. We can use the airbrush preset again but turn on the “eraser” mode and just reduce the highlights at the edges to make them gradually fade out. Next, to clean out the outer area. We can use layer selection and then erase, but I’m going to show you a different method here and that is using the transparency mask. First hold Ctrl and then click on the head layer. Hold Ctrl and Shift and click on the eyebrow layer. So now we have this selection.

Click on the caret button down here and create a transparency mask. If there is an active selection when creating transparency mask, Krita will use that selection as the white color inside the mask.
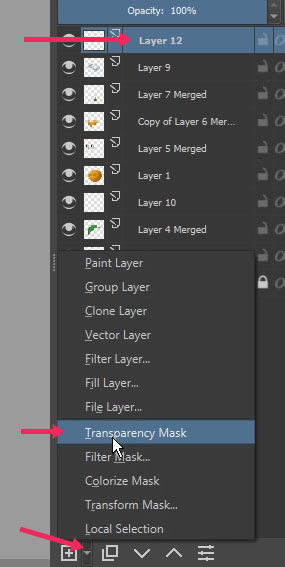
If you don’t know what mask is, just check my other tutorial about masks in Krita. It will be too long to discuss it now, so let’s just move on to texturing the dark areas.
For the dark areas. Let’s create a new layer below the previous highlight texture layer. I’m just using the normal blending mode for now. And let’s add a transparency mask just like how we did in the previous highlight texture. Use the same chalk brush preset. Pick the color in the dark area and make it even darker. And just apply the texture on dark areas of the head. You may want to change the brush size around to make give it more variety. Then just like before, we can erase some parts of it to create nice gradation. Okay. We can add more and more texture, but let’s just assume that the texturing process is done now.

Adding backlights
The final step of this illustration is to add backlights or rim lights or reflected lights, whichever you want to call it. Of course there are different definitions for each of these terms, but we’ll cover them on another tutorials. In sha Allah. For now, just imagine there a lot of light rays bouncing off of the floor in here. Or from the right side to the head area.

Essentially these lights will make this dark areas a bit brighter at the edges. For this, let’s make a new layer. Hold Ctrl and click on the previous existing transparency mask to create a selection. And then add a transparency mask for the new layer. For the color you can have any funky colors like pink or green. It all depends on the color of environment. Now, because we’re not drawing any environment in this illustration and we already use bluish color for the casted shadow, let’s just use a bright blue color for now. Change the blending mode to screen. And apply the color using the airbrush brush preset.
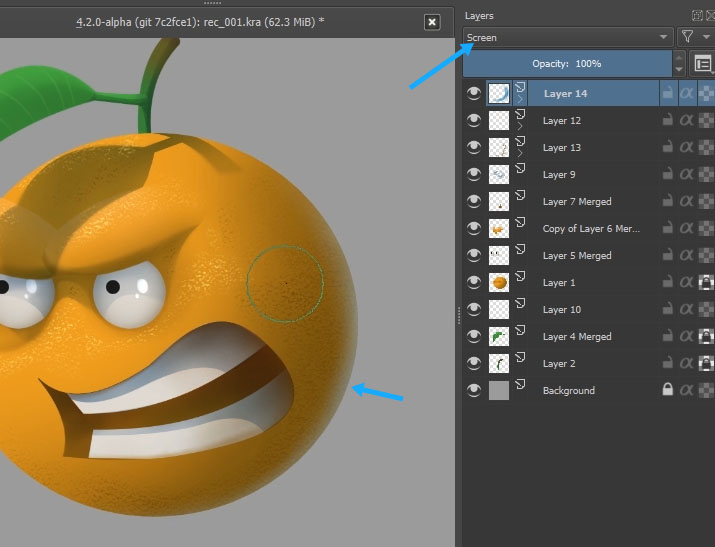
Okay guys, so there you go. Our angry orange digital painting using Krita 4.2.
If you want to learn Krita from scratch, and master all of the in-depth digital painting skills in the shortest time possible. Then you should definitely join my courses on Udemy or Skillshare. You can start with this course “Digital painting with Krita 5.0 for beginners”.
If you want to request a tutorial just put that on the comment section below. Wassalamu’alaikum.



[…] Part 3 where we cover: […]
[…] Part 3 where we cover: […]