
In this tutorial video I’ll be teaching you how to draw this digital painting of an angry orange from start to finish. This is the second part of the tutorial series. So you do need to watch or read the first part if you want make sense out of it. And as I mentioned before and also stated in the article title, I’ll be using Krita version 4.2 in this tutorial. Basically if you want to follow along, just make sure you have this version or any newer versions installed. Okay.
Here are the links to all of the 3 parts of this tutorial series.
- Part 1 where we cover:
- Base coloring
- Shading the body
- Creating the eyes
- Creating the eyebrows
- Part 2 which is this article you see now where we cover:
- Creating the mouth
- Merging layers
- Shading the eyes area
- Mouth casted shadows
- Eyes casted shadow
- Part 3 where we cover:
- Twig color
- Leaf shading
- Leaf casted shadow
- Adding textures
- Adding backlights
Creating the mouth
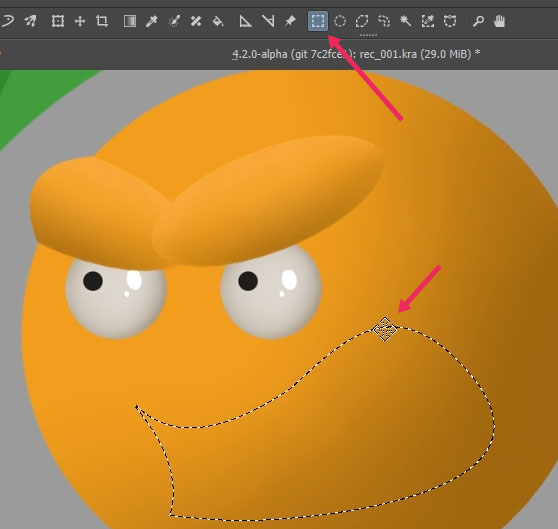
At this stage we want to create the mouth for our orange fruit character. For the mouth let’s create a new layer. And use the “bezier curve selection” tool to create the shape of the mouth.

If you need to revise the selection shape we can do that. For example I think this front mouth area is too curved. While still in the “bezier selection” tool, press A. This will activate the “add” selection action mode. Which is the same as pressing this button in here.

In this mode if we create a selection region, it will add the new selection to the previous selection region. We can also do subtract selection by pressing S. Or you can press this button in here instead (see the image before). Now if we create a selection, it will cut out or reduce the existing selection region. Okay.
To find the best spot for the mouth we can move the selection region around. But a little warning here for this feature. You can only move selection region if you are using Krita version 4.2 or above. You can not use this feature if you have older version such as 4.17 for example. Okay. To move the selection region, you need to be in any of the selection tools, except the bezier curve selection tool. This behavior may get changed in the future release, but this is what I have currently. So let’s activate the rectangular selection tool. Move the mouse to the border of the selection region until we can see this 4 arrow cursor, and then just move the selection around until we find the perfect location for the mouth. Okay.
Next, let’s pick the darkest color of the body shade color. Then press Shift+Backspace.
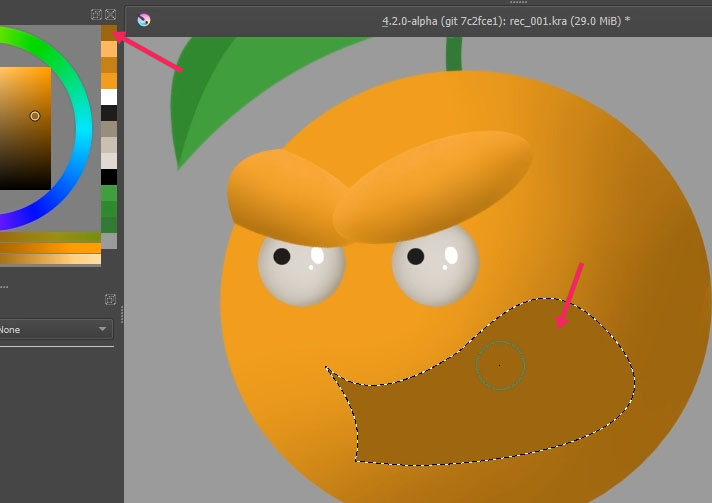
Now pick darker color that slightly move towards the red colors. Use the airbrush preset and make the upper area and also the right side area to be darker and more reddish. I think we need to add even more darker color now. Just my personal taste. Okay.

Next we want to create the upper teeth. Create a new layer first. Use the “bezier curve” tool again. Pick our previous base color for the eye color. And create the shape for the upper teeth. If you failed at the first try, don’t worry. We can still add or subtract pixel regions until we get the shape that we like. We can do this because currently we have the teeth on it’s own independent layer. Create the lower teeth using the same techniques. Okay, so now we have both the upper teeth and the lower teeth.

Now to add more depth into the teeth. Let’s erase the side part of it so it looks like it is going into the mouth. For this we can use the airbrush preset, but turn the eraser mode on. And just remove the right part gradually. Of course you can do this also using the previous method, which is having the alpha lock turned on, then use the glazing brush and finally use the blur brush. Currently I just I want to show you guys a different approach to this. Okay.

Merging layers
Currently we have the teeth and the mouth in two different layers. Let’s combine these 2 layers together using Ctrl+E shortcut.
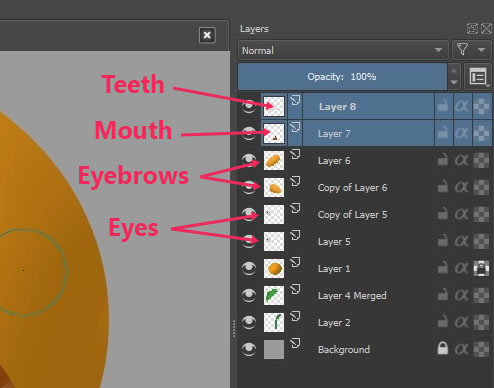
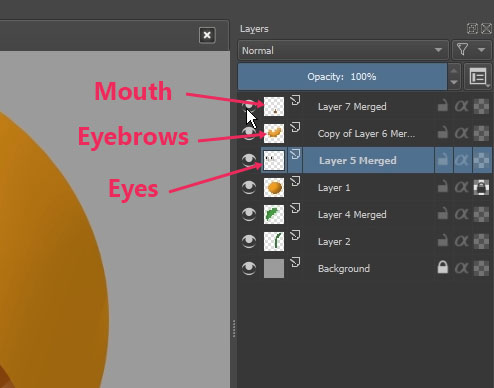
For the eyebrows, we also have 2 layers. Let’s combine these together also. And finally we have 2 layers for the left eye and the right eye. Let’s combine them also into a single layer. So this is what we have so far: The mouth layer, eyebrow layer, the eye layer, the body layer and so on.
Shading the eyes area
Next, we’re going to add more shadow colors around the eyes. For this we can use the main body layer. Pick the dark orange color and let’s use the airbrush preset. Make the brush size a bit bigger. And just add some dark areas around the eyes to suggest that there are cavities in this area. And let’s add some more stronger dark lines around the eyes. For this I’m using the glazing brush.

Okay next we want to add additional eye-bag line. I don’t think we need any eye-bag line at the right side because it is already pushed by the chick. Let’s just create one at the left side and see how it goes. For this we’re going to use the “bezier curve selection” tool again. For your information I already assign “bezier curve selection” tool to a custom keyboard shortcut. I’m using the letter C key to access it. Another custom shortcut that use is “Z” letter key to access the “outline selection tool”. Now, you don’t need to follow my setup for the custom shortcuts. You just need to know that I switch to different tools using custom shortcuts in this tutorial.

Okay. To make this shading colors look more painterly we can use the smear brush. We can use this brush to push pixels around. You may want to add more eye-bag lines if you have a character that is very old or in the background story the character hasn’t slept for days for example. Okay I think this is already looks good.
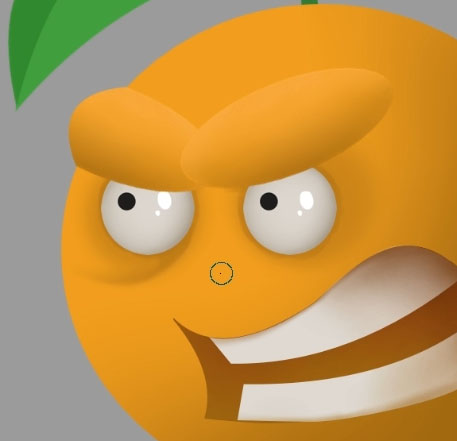
Next we want to add more contact shadows between the eyebrow and the main head area. I’m using the “bezier curve selection” tool again and create a selection where I think the contact shadows should exist.

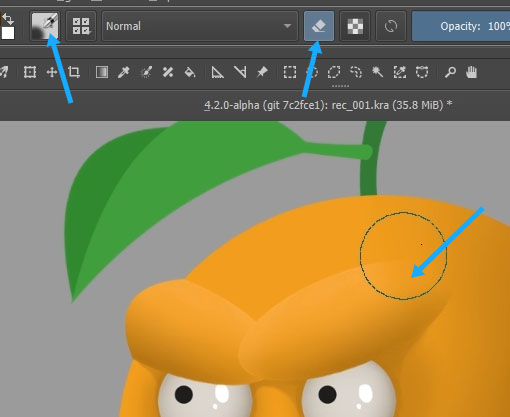
Use the airbrush preset to add the color. And use the smear brush preset to push and to smooth out the shadow edges. Next we want to make the eyebrows blend more with the head. To do this we can use the “airbrush” preset but turn on the “eraser” mode by pressing “E”. And just erase the right part of this eyebrow gradually. Okay.
Next let’s fix the shading in the center where the eyebrows meet each other. Basically it is the same process here again and again. Create selection. Then use the airbrush preset to add the shading color. And finally the blur or the smear brush to smooth out the pixels. Okay.

Mouth casted shadows
Next we want to add drop shadows or casted shadows. Essentially they are shadows projected from one object that falls onto another objects. For this kind of shadow it will be easier to use a dedicated layer. And change the “blending mode” to “multiply”. This is because “multiply” will make colors below this layer still visible but becomes darker, which is exactly the behavior we want to have from shadow colors.

And for casted shadow I usually pick color from the sky or the environment, not color from the object itself. I know we only have grey color in the background, but just imagine we have a blue sky environment surrounding this orange fruit. So let’s pick a blue color for the casted shadow color. Okay, now just imagine if the lights are hitting the upper lip of the mouth, this will create casted shadow on the upper teeth area. We can create the selection like this and on the right area the shadow is like dropping because it is already blocked by the shape of the head.
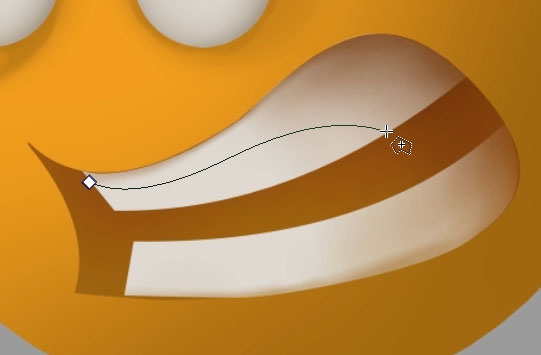
Then we need to follow the curve of the mouth, or we can also take care of it later. Let me show you the second option now.
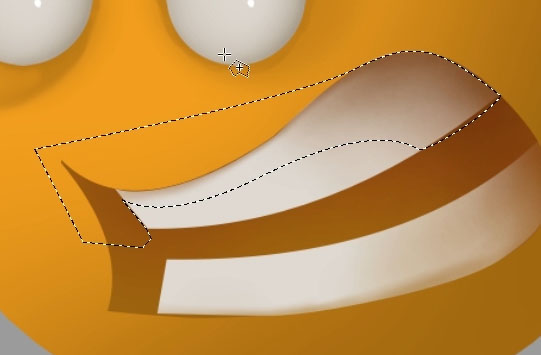
Next, pick the airbrush preset and colorize the selection region. Try to make the upper part darker then the lower part.

Okay, now to remove the excessive part. We can press Ctrl+A first. This will create a selection that covers the whole canvas. Then hold Ctrl and Alt and click on the mouth layer thumbnail like this.
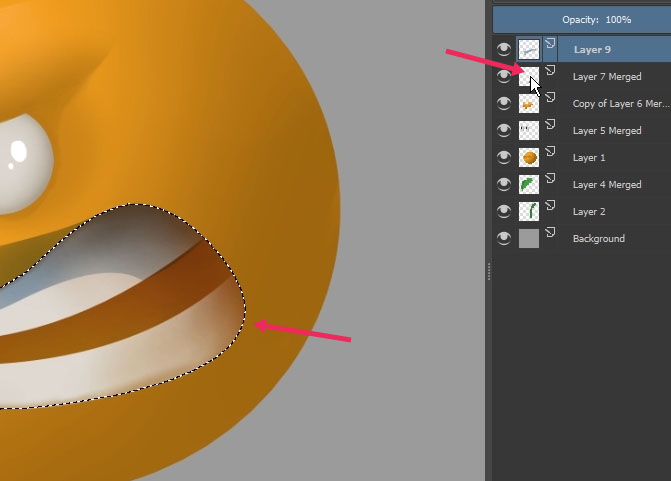
Now, the whole canvas is selected except the mouth area. This way if we press Delete the outer shadow colors are now gone. Okay. Now for the lower teeth, just imagine that the shadow of the upper teeth drops on the lower teeth. The same process here but for this one, we want to trace all of the selection manually. It seems that, it is hard to do this vector selection, but trust me it is easy once you get the hang of it. All you need is just a bit of practice. I have several courses at Udemy for vector editing if you are interested.

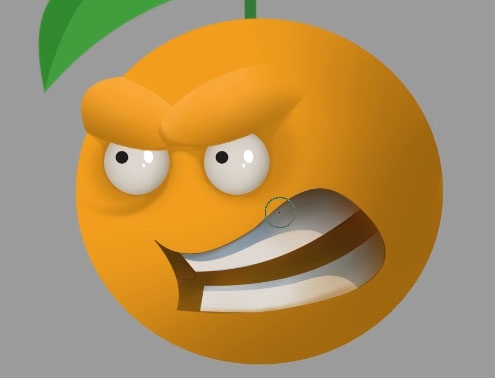
Okay. Use the airbrush preset again just like before. And we have a nice looking casted shadows. So, now we have a finished mouth area. Of course we can still keep refining and refining to make the mouth looks even better and smoother. But the techniques will be essentially the same. So to save time, I’ll just consider this to be done. Okay.
Eyes casted shadow
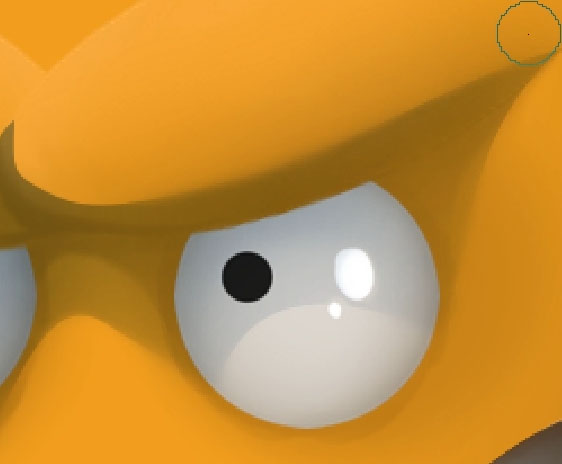
Next we want to start adding casted shadows on the eyes area. Basically the process is the same like how we did with the mouth. Use the “bezier curve selection” tool and create the selection area of where you think the shadow will fall. So, for this process you do need to use your imagination a bit. For this case, the casted shadow area is fairly similar with the previous shading color we added before.
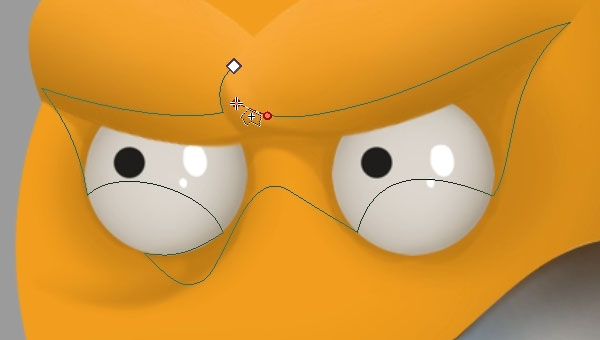
Next, just like before we also use the airbrush preset to apply the shadow colors.
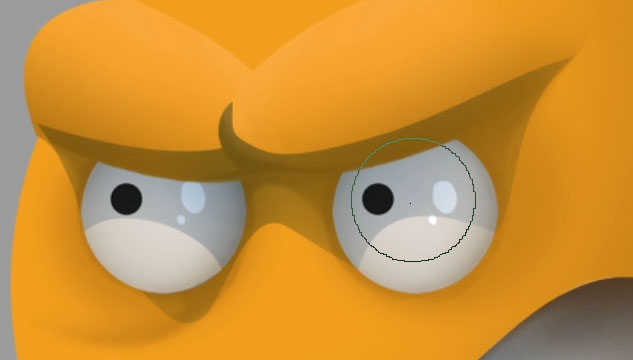
Okay guys I think the shadow color is too strong on the eyeballs area. So let’s reduce them a bit using the airbrush preset but with eraser mode turned on. Especially we want to remove any shading color from the specular area to maintain the glossy look of the eyeballs.

Next we need to make the shadow that are further away from the eyebrows to be slightly blurred. Let’s use the “blur brush” for this task.

I think we need to blur this area also because the eyebrow shape is round so the shadow should fall gradually, and looks smooth not sharp.
Okay guys. Let’s wrap up this second part of the tutorial series. I’ll see you guys in the third part video, in sha Allah. Wassalamualaikum.



[…] Part 2 where we cover: […]
[…] third or the last part of the tutorial series. So if you haven’t see the first part and the second part, please do so first before you start watching this one. I’ll be using Krita version 4.2 for this […]